CALL TODAY! → (321) 746-4744

Sod Installation 101: Tips for a Lush, Green Lawn
Get the inside scoop on sod installation! From selecting the right type of grass to understanding proper care and maintenance, this guide will help you achieve a vibrant, picture-perfect lawn year-round.
12/12/20245 min read

Choosing the Right Type of Grass
Selecting the appropriate type of grass for your sod installation is paramount to achieving a lush and vibrant lawn. Different grass varieties possess distinct characteristics, making them more suitable for certain climates, soil types, and intended uses. Understanding these attributes is essential for making an informed decision that ensures the health and sustainability of your lawn.
One notable type is Bermuda grass, which thrives in warm climates, making it popular in southern regions. It is characterized by its robust growth and drought resistance, making it ideal for lawns subjected to heavy foot traffic and full sun exposure. Bermuda grass establishes quickly and can handle heat well, making it an excellent choice for sports fields and residential lawns alike.
Another common option is Kentucky bluegrass, favored for its rich green color and dense growth habit. This cool-season grass flourishes in northern climates where temperatures can vary significantly. Kentucky bluegrass is known for its shade tolerance, although it performs best in well-drained soils and moderate sunlight. Its ability to rejuvenate from dormancy makes it both a beautiful and resilient choice for residential landscapes.
Fescue is another versatile option, often recommended for transitional zones. This group includes tall fescue and fine fescue, each with unique traits. Tall fescue is celebrated for its drought tolerance, adaptability to various soil conditions, and deep rooting system, while fine fescue is suitable for shaded areas. When considering fescue, pay attention to the specific variety best suited for your lawn's environment.
In addition to understanding the grass types, it is critical to assess factors such as shade tolerance and drought resistance. Location, climate, and soil quality can greatly influence the success of your chosen grass type. Tailoring your selection to these considerations will lead to a more sustainable and enjoyable lawn. Your local extension service or garden center can provide further guidance based on your specific regional and environmental conditions.
Preparing Your Yard for Sod Installation
Before laying sod, it is essential to prepare your yard properly to ensure successful establishment and a vibrant, healthy lawn. The first step in this process is conducting a soil test. Testing the soil allows homeowners to identify the nutrient levels and pH balance, which significantly influence grass growth. Services are available to help analyze the soil and offer recommendations for any necessary amendments, ensuring that the soil conditions are suitable for sod installation.
Next, it is important to remove any existing grass, weeds, or debris from the area where sod will be installed. This can be accomplished through several methods, including manual removal, use of a sod cutter, or applying a non-selective herbicide. Regardless of the method chosen, ensure that the area is cleared completely, as any leftover vegetation can compete with the new sod for nutrients and water, hindering establishment.
Aerating the soil is another crucial step in preparing the yard for sod. Aeration involves perforating the soil with holes to allow air, water, and nutrients to penetrate the root zone. This process promotes deeper root growth and improves drainage, further enhancing the conditions for the new sod. Following aeration, you may need to level the ground. Uneven surfaces can create difficulties when watering and can lead to poor sod establishment, so it's important to fill in low spots and remove any high areas.
Finally, enriching the soil with compost or fertilizers can create an optimal environment for your new sod. Compost adds valuable nutrients while also improving soil texture and water retention. Fertilizers, particularly those formulated for the specific grass type, can provide immediate nutrients necessary for growth. Careful preparation of the yard not only sets the stage for successful sod installation but also fosters long-term lawn health.
Installing Sod: Step-by-Step Process
Installing sod is a crucial step toward achieving a lush, green lawn. The process begins with careful measurement of the area where sod will be placed. Utilize a measuring tape to ascertain the length and width of the site. Multiply these dimensions to determine the total square footage required for sod. It is wise to order slightly more than calculated to accommodate any necessary adjustments or errors during installation.
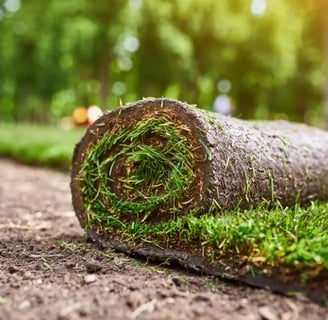
Once the area is prepped, which includes removing existing grass, weeds, and debris, the next step is rolling out the sod. Start by laying down the first roll along the longest straight edge of the area. This ensures alignment and simplifies the installation process. As you unroll each piece of sod, gently press the seams together, staggering them like bricks to create a seamless appearance. Maintaining this staggered pattern prevents any visible lines and promotes a healthier, more uniform lawn.
Alignment is key during the installation process. Ensure each piece of sod is placed tightly against the neighboring sod without overlapping or leaving gaps. Special attention should be given to corners and edges; trimming the sod with a sharp knife will help fit it snugly into these areas, providing a neat finish. Use of a landscape roller can also enhance sod contact with the soil, especially after installation.
Immediately after installation, it is essential to water the sod thoroughly. This initial watering helps to settle the new sod into the soil and promotes quick rooting. The guideline for watering is to keep the sod moist, not saturated, until the roots establish themselves, typically about two weeks. Lastly, when handling heavy rolls of sod, always prioritize safety by utilizing proper lifting techniques and protective gear to prevent injury.
Caring for Your New Lawn: Maintenance Tips
Successfully maintaining a newly installed sod lawn is essential for establishing a vibrant and healthy landscape. In the initial weeks following installation, proper watering practices are critical. It is advisable to water the sod daily for the first two weeks, ensuring that the soil remains consistently moist but not waterlogged. A general rule of thumb is to provide approximately 1 to 1.5 inches of water per week. As the grass begins to establish, the watering frequency can gradually be reduced to two to three times a week, promoting deeper root growth and drought resistance.
Once your sod is firmly rooted, you will need to consider mowing guidelines. It is important to wait until the grass reaches about three inches in height before the first mowing, which typically occurs two to three weeks after installation. Setting the mower blade to a higher setting—around three inches—will help preserve moisture and prevent stress to the grass. Regular mowing will also encourage thick, luscious growth and limit weed competition. An appropriate mowing schedule of every 7 to 14 days is generally recommended, depending on the growth pace.
Fertilization practices should reflect the specific type of grass you have installed. Generally, new sod requires a starter fertilizer rich in phosphorus to promote strong root development. Applying this fertilizer about four to six weeks post-installation will set your lawn on a path to healthy growth. Additionally, be vigilant for common issues such as pest invasions or diseases like brown patch and grubs. Regular inspection will help identify these problems early, allowing for prompt intervention. The adoption of integrated pest management strategies can further ensure a strong resistance against common threats, allowing your lawn to thrive.
GET IN TOUCH
EMAIL:
FOLLOW US ON SOCIAL MEDIA
SUBSCRIBE TO OUR NEWSLETTER
CALL:
HOURS:
Mon-Fri 7:00am-6:00pm
Sat 8:00am-4:00pm
COPYRIGHT © 2025 ITS YOUR CHOICE LAWN SERVICE INC.

